
Today, I tackled a problem for us moms out there. Or at least ;) those of us too busy to fish our bras out of the washer before they go in the dryer. In all fairness to my mom, she has told me a number of times, they will last longer and work better if I air dry them. The fact remains that if I remember to get the laundry from the washer to the dryer in the same day, I consider it a miracle :).
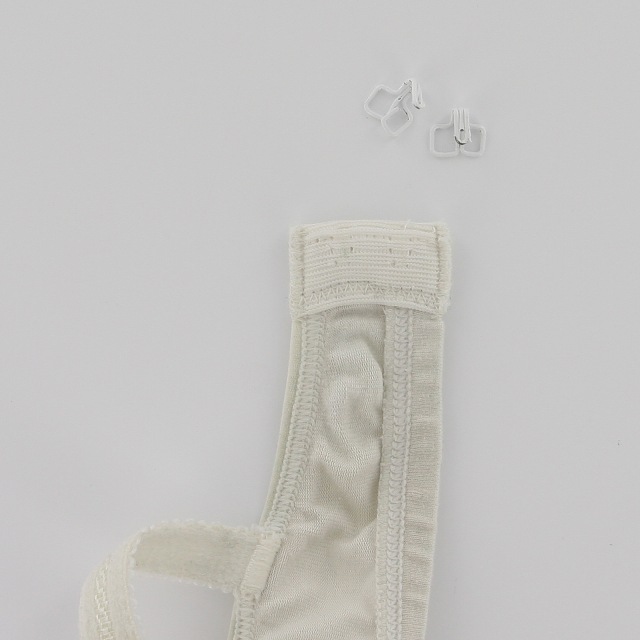
Besides wearing them out quicker, I have found that front loading machines like to grab the bra hooks and mangle them. I have grown tired of the hooks poking me in the back or not hooking at all anymore.
KAM Snaps to the rescue with a seam ripper and just a couple snaps... See the picture tutorial below.
Supplies:
Seam Ripper
KAM Snap Pliers and Awl
3 KAM Snap Caps, 2 Studs, and 1 Socket


1. Use a Seam Ripper to remove the stitches holding the Bra hooks in place.
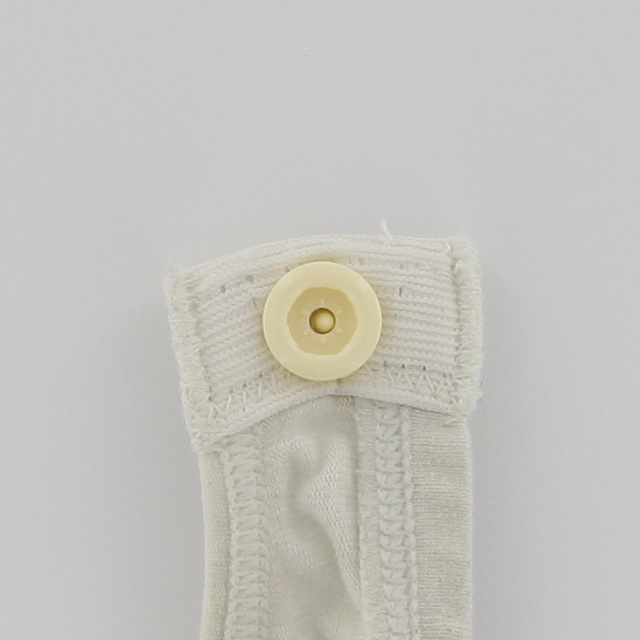
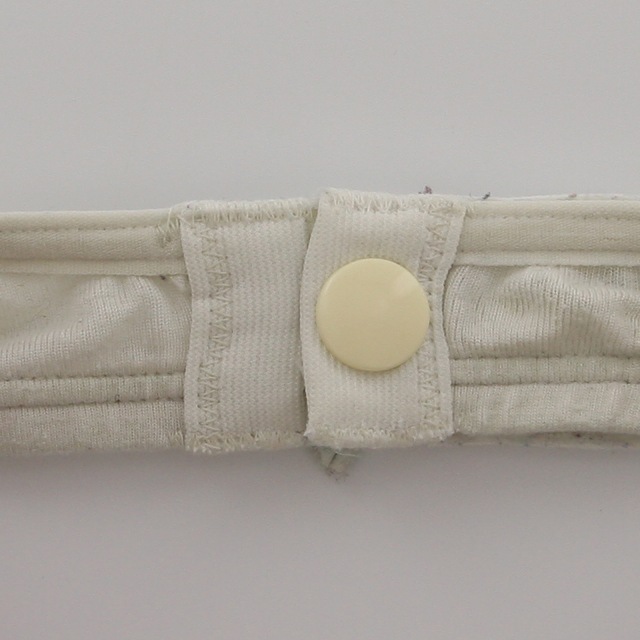
2. Once the hooks are removed, use the Awl to poke a hole where you want to install the snap. I used a KAM Snap Cap and Socket on this side.
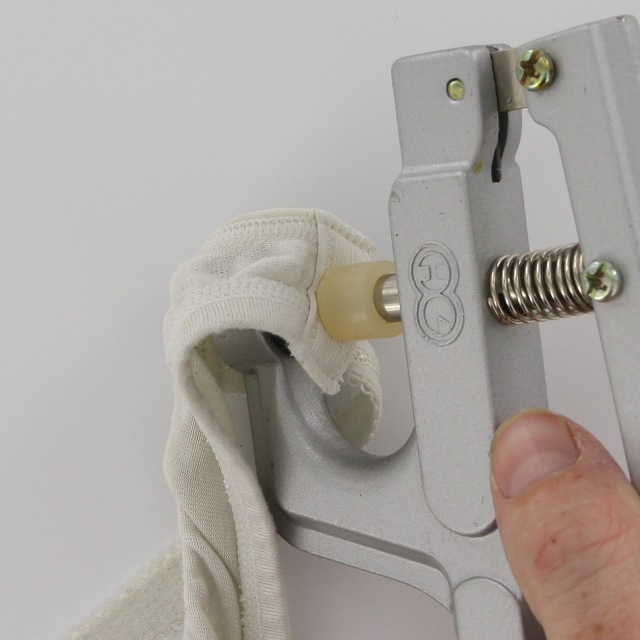
3. Install the snap.


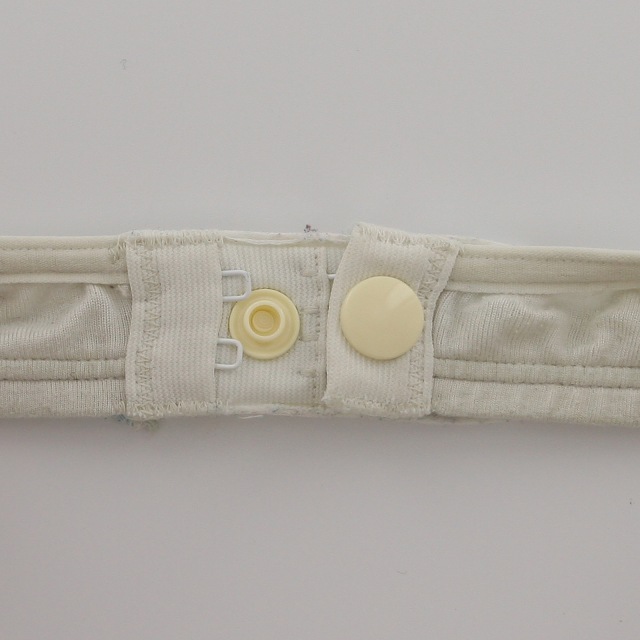
4. I put 2 sets on the back strap for size adjustment, you could do 3 if you wanted. I used a 2 KAM Snap Caps and 2 Studs on this side, and spaced them evenly.
5. Tada! Success, I am wearing it as I type. It is much more comfortable and it was easy to snap, I was concerned considering I had to do it by feel, but it was simple to do.
No comments:
Post a Comment